
3d road vector drawing using illustrator
In This tutorial, we will draw one point perspective road vector using illustrator cc. The simple way is to apply multiple strokes to a path. Let’s get started.
illustrator perspective road design consists of the following steps:
Step 1. Create a new document
- Create a new document in the size you want. I created a 1920 × 1080 px RGB Artboard
Step 2. Create a line
- Select the Line Segment Tool on the Tools Panel.
- Specify the middle of the document as the line starting point. When you drag the cursor towards the middle of the document, smart guides will appear. If it is not active, you can activate it with CTRL / CMD + U
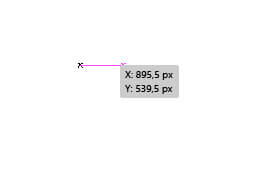
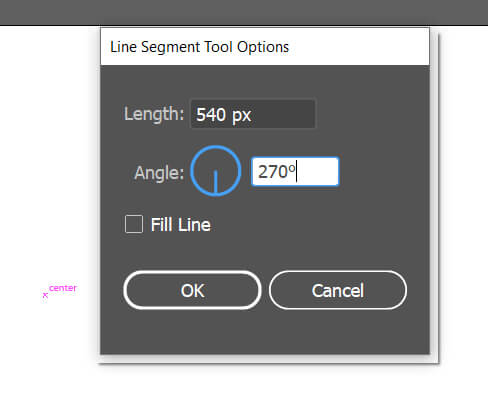
- Click on the document center to open the dialog box for the Line segment tool.
- Create a 540px long and 270 ° angle line
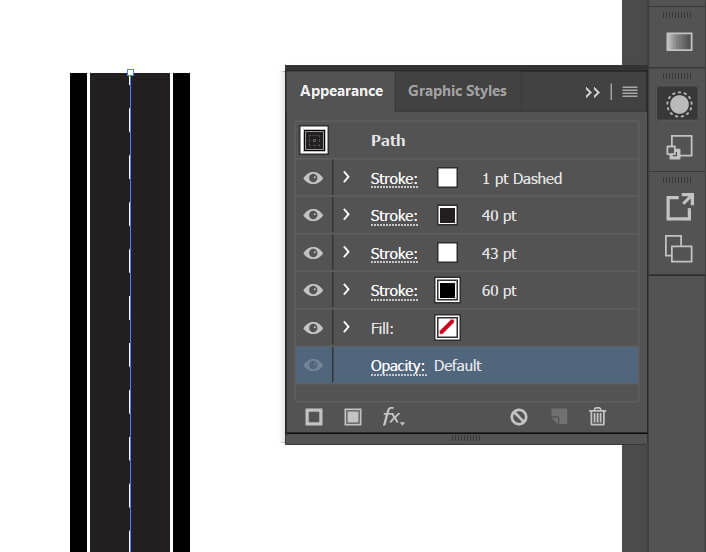
Step 3. Add new stroke
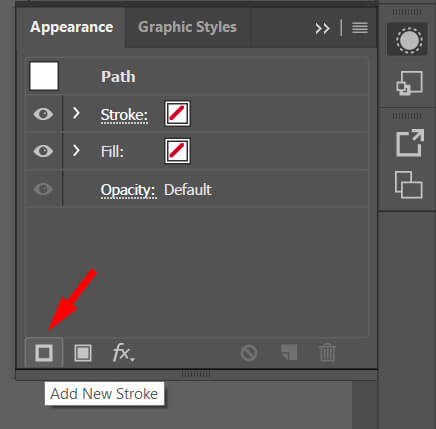
- Make sure the line you created is selected
- Open the appearance panel
- Add 3 new strokes by clicking the lower-left corner of the panel
- Adjust the thickness and properties of the strokes you add. To open the Stroke panel, simply click the underlined “stroke” phrase on the Appearance panel.
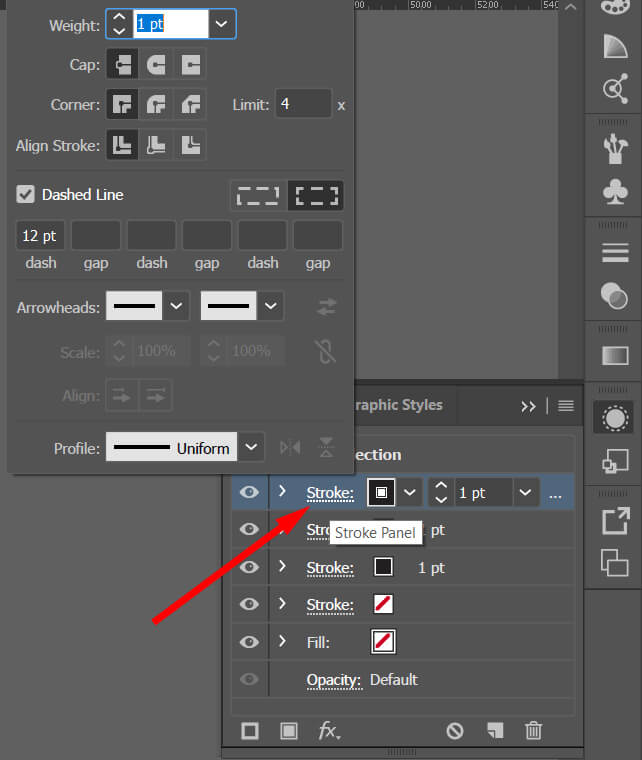
Edit the properties of the stroke as indicated in the picture. (Do not forget to make the first stroke dashed, this will create the dashed line on the road)
Step 4. Expand the strokes you created
- Adding extra strokes in the illustrator is counted as an effect. So use ” Object / Expand appearance ” to expand it.
- This command makes the strokes we created separate paths. It generates 4 paths in grouped form. However, the perspective effects cannot be given since they are still paths. That’s why,
- Convert your paths to shapes with the Object / Expand command. The expand command opens a dialog window. In the window that opens, just expand the Strokes only.
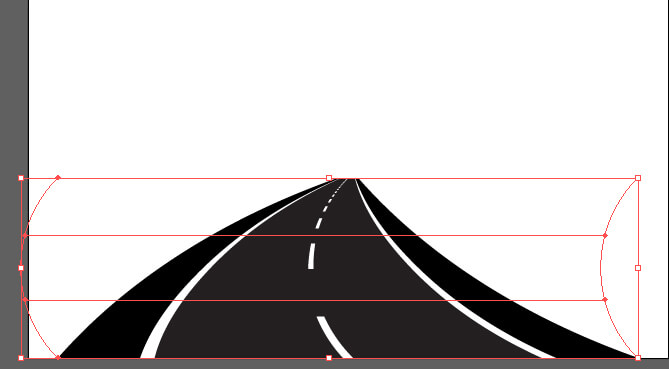
Step 5. Creating a perspective effect
- Make sure the objects you created are selected.
- Select the Free Transform tool (E) on the tool panel and then the Perspective Distort tool.
- Click the left or right lower corner of the selected object. Shift left or right according to the corner of your choice.

- If you wish, you can create a curved road with Envelop Distort . Run the Object / Envelop Distort / make with warp command
- select from the pop-up dialog box as Archer.
- Click vertical option and make the adjustments you want from the preview by checking the preview option
I hope you enjoy it. Do not forget to leave a comment down below.
Akif Kutlu
How to draw perspective road vector in illustrator
")
