This tutorial shows you how to draw coil spring vector in illustrator. Additionally, spring vector is designed for use as a pattern brush. You can easily apply to any path of objects.
What is a coil spring?
A coil spring is a mechanical device which stores energy and releases it. The shape of this device is similar to a metal wire wrapped around a cylinder. Therefore it is sometimes called helical spring. There are many types of springs in mechanical engineering. Here I focused only on the shape of the device and described the steps of drawing coil spring.
How to draw coil spring?
Step 1: Select the Line Segment Tool (L) and click somewhere in the newly created artboard. When the dialog box open, give the length 200 and 0 (Zero) for angle value. You will have a horizontally aligned line. If required use zoom tool or CTRL + + to zoom in to your new line.
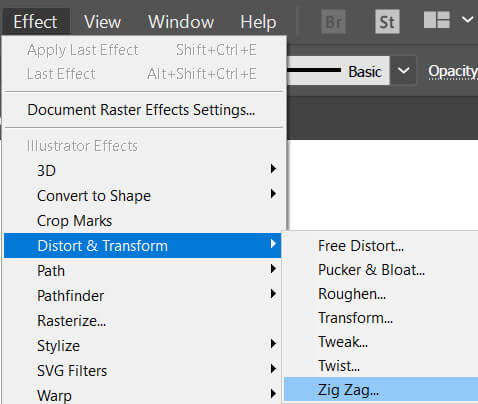
Step 2: while the line is selected run the Zig Zag command. Effect > Distort & Transform > Zig Zag. Set the size of the effect 50px, Absolute, 4 Ridges per segment and smooth options in the dialog box. Hit Ok if all set.
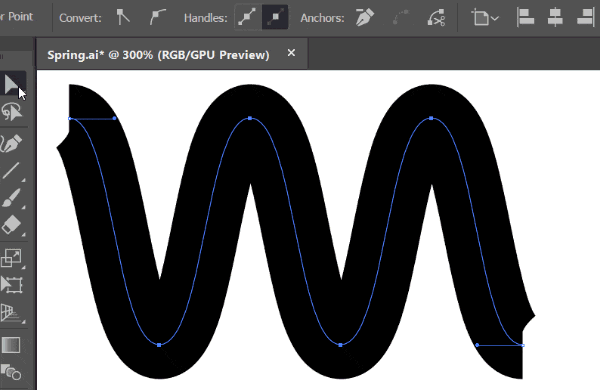
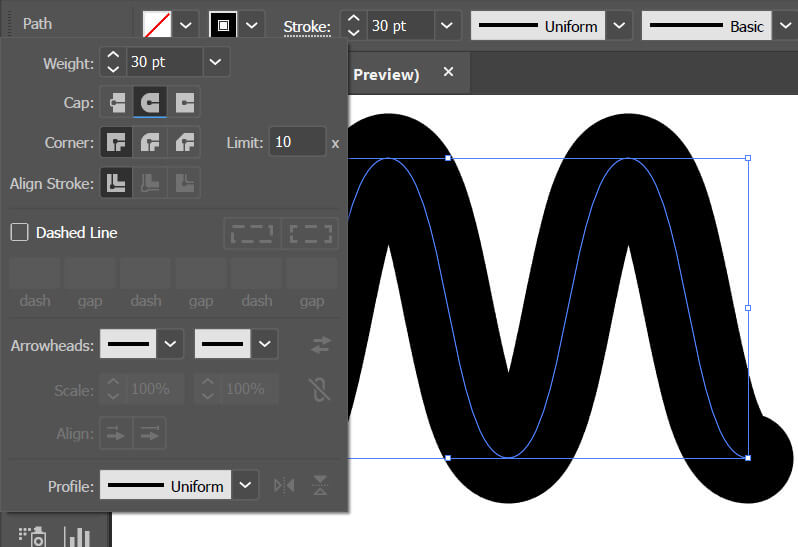
Step 3: Make stroke thickness 30pt and expand your shape using Object > Expand Appearance. You get the vector like this:

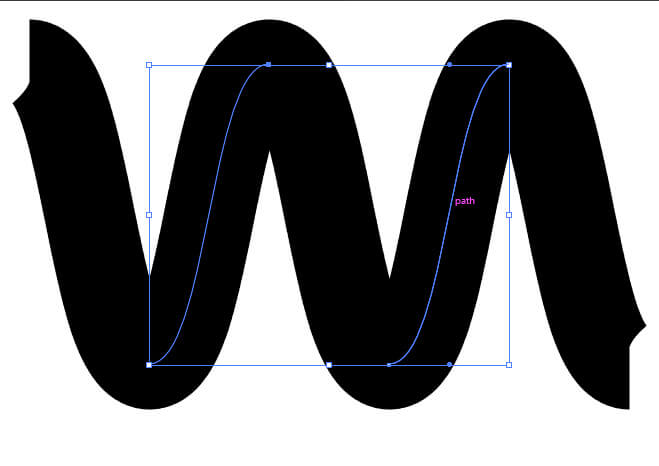
Step 4: Cut the line from anchor points shown below. Use Direct selection tool to select the anchors and run Cut path command as shown.
Step 5: Now select the two paths using Selection Tool (V) and SHIFT + Left mouse button as shown below. Bring them to the front (Object > Arrange > Bring to Front)
Step 6: Select All paths (CTRL/CMD + A) make round cap using stroke panel. Expand your strokes only, going to Object > Expand command.
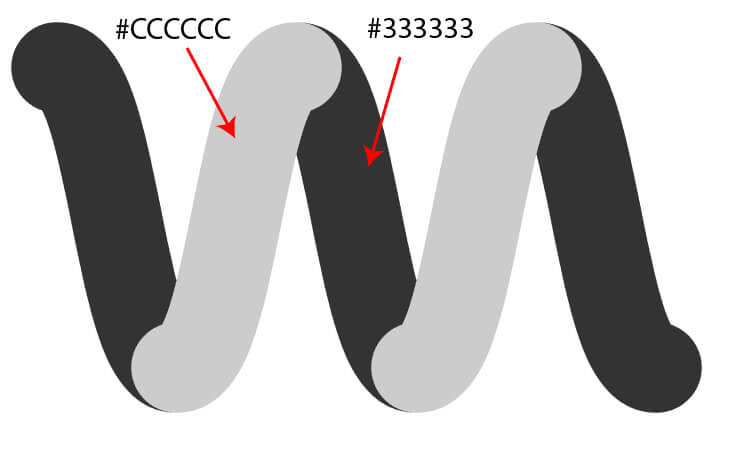
Step 7: Change the colors of objects as shown. You can choose any color.
The coil spring base shape is ready. Now let’s make a brush from this shape. You need to make sure that when the objects copied sequentially, they should stick together without any gap and should be seamless. Therefore:
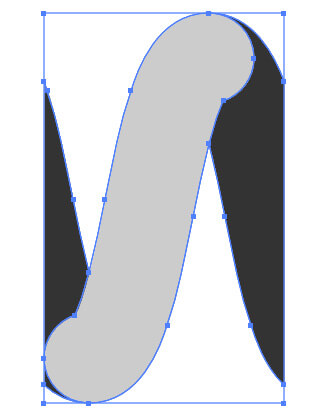
Step 8: Crop your coil spring using rectangle tool as shown below. To make precise alignment make sure only the Snap to point is open. Turn off other snaps if open. Select your objects and use Crop command in the Pathfinder panel.
Step 9: drag your final shape using the left mouse button and drop it into the brushes panel.
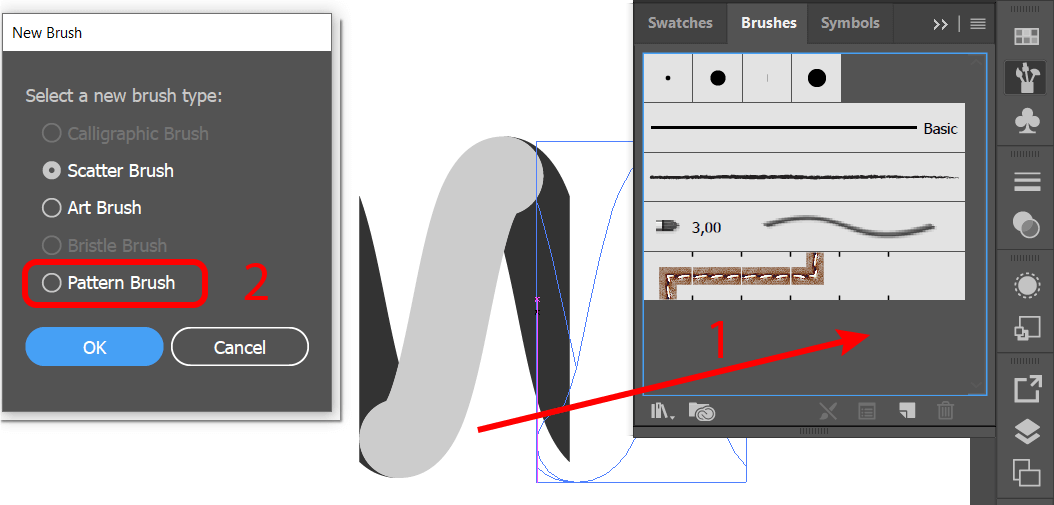
Choose Pattern Brush from the menu and hit ok.
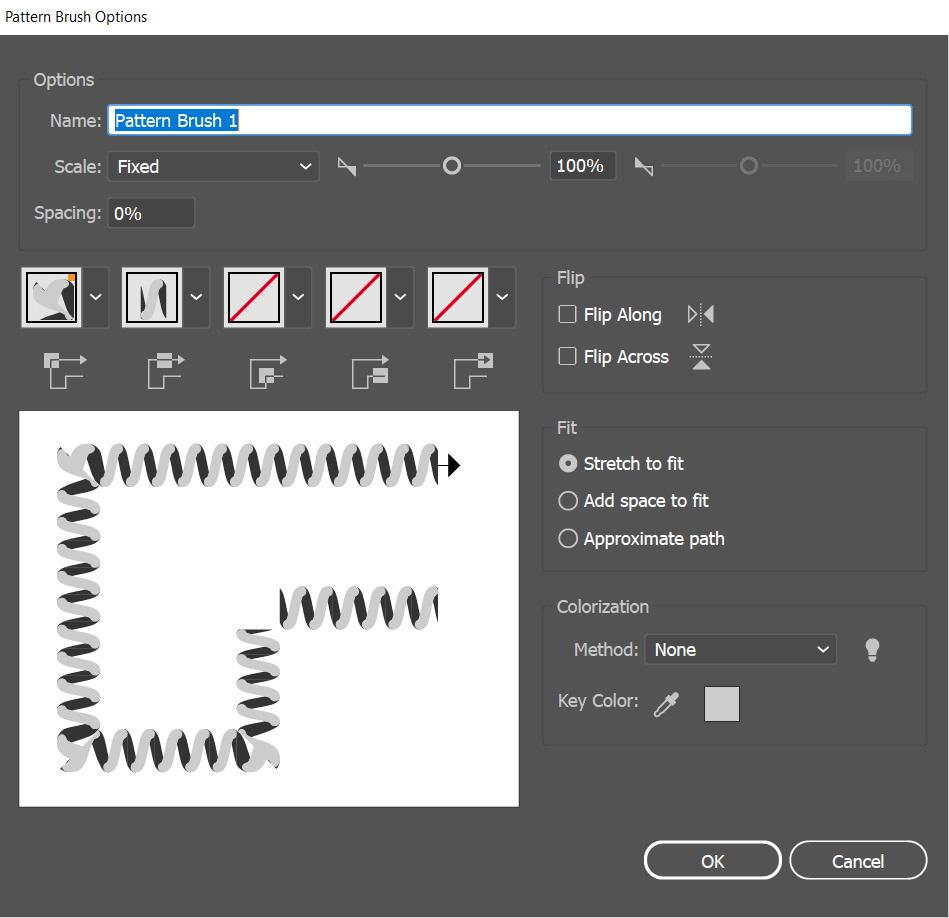
Step 10: No need to make any other changes in the options panel. Just hit ok.
The brush is ready for use. pick the brush tool and paint the arboard 🙂