Neon light is a popular method used in illuminated signage construction. You can create a neon effect for both text and shapes in Illustrator. If you want to add a neon light effect to your drawings, simply follow the steps outlined here. Since this is an advanced-level tutorial, we won’t cover how to draw simple objects.
Step 1. create the shape
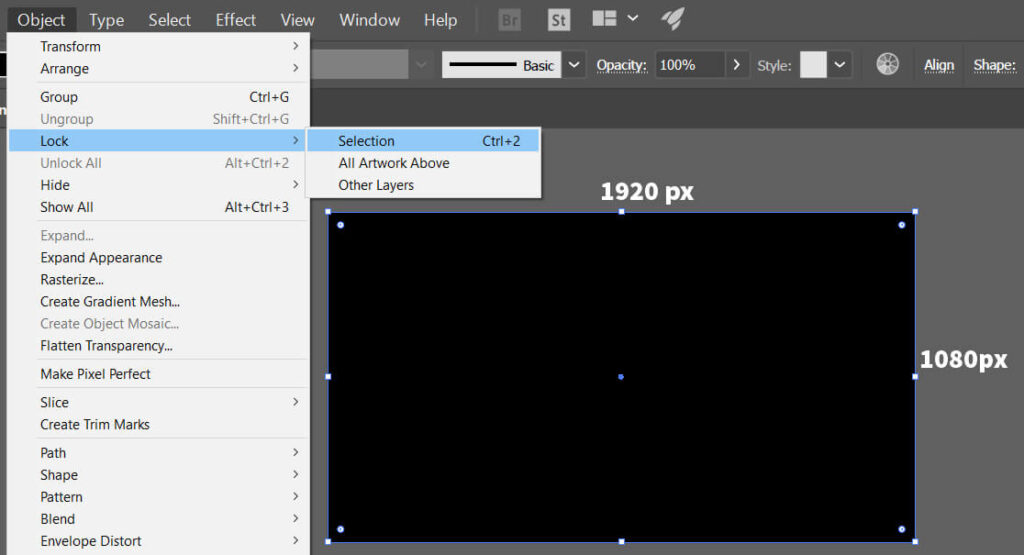
- For the neon effect, it is necessary to create a black background first. The black background makes the effect appear clear. Create a canvas-sized rectangle for the black background. After that, place it to cover the work area and lock it with the ” object> Lock ” command while the rectangle is selected.
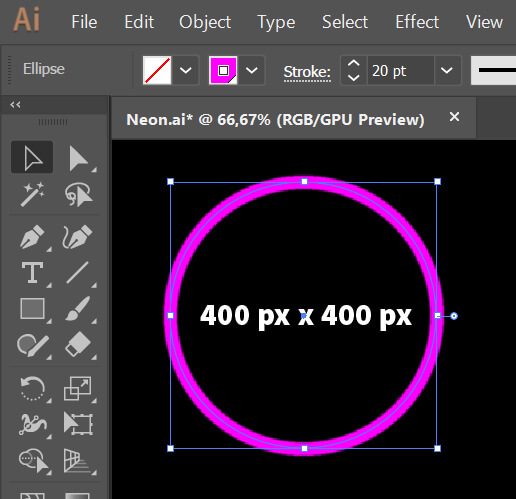
- Create a circle 400 x 400 px dimensions and stroke weight of 20 pt .
Step 2. Define the base color
- If the circle you create has a fill color, delete it. Set the stroke color to RGB Magenta (magenta purple).
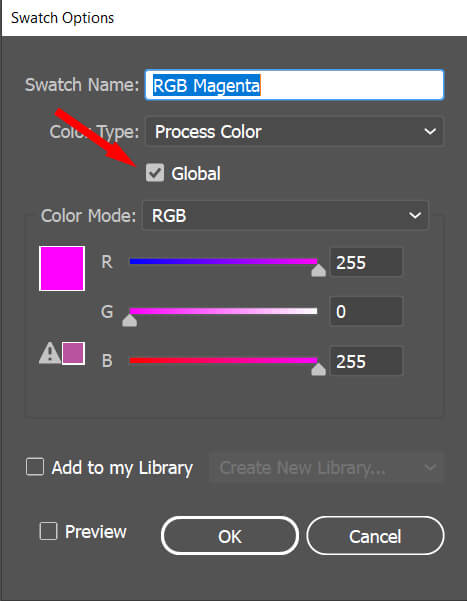
- Double click the RGB magenta color tile to make a global color definition. Check the global box in the swatch options dialog box.
You define the color as “global” because you can then easily change the color of the circle using that color’s tints.
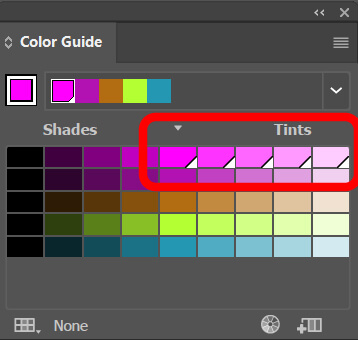
If you define a color as global, a white triangle appears in the lower right corner of the color box. This triangle mark shows on the base color and all of its tints. To see which tints are set as global, simply use the Window > Color Guide panel.
Step 3. Apply Effects
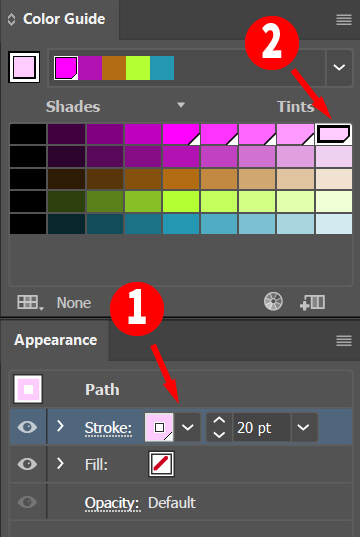
The color tints of the magenta color should be selected from the global tones in the ” color guide ” panel. Therefore, ” appearance panel ” and ” color guide panel ” should be open in the workspace .
- Now, make sure the circle you draw is selected. In the appearance panel, you should see a magenta color and 20pt thick stroke. Select it with the mouse (1) and change the color of the stroke with the lightest tone (2) in the color guide panel.
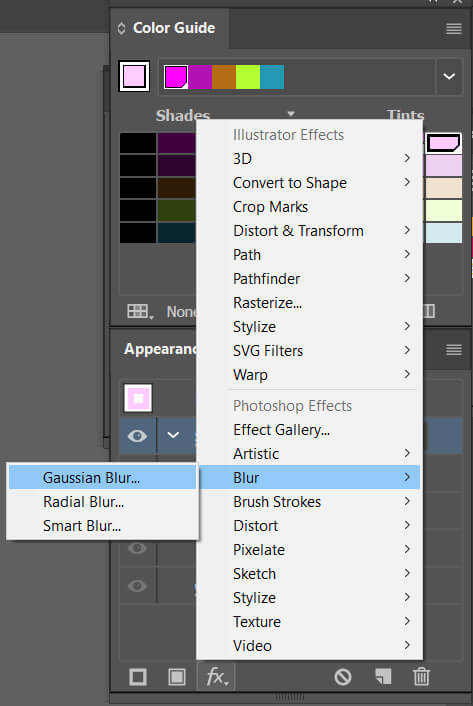
- Apply the 1 px “gaussian blur” effect to the selected line using the “fx” icon in the Appeararence panel.
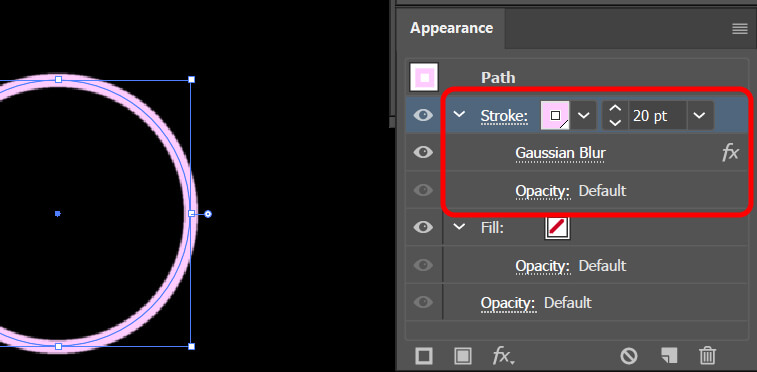
The “gaussian blur” effect should appear under the stroke line, as seen in the appearance panel below.
- Create 3 copies of “stroke with gaussian blur”. You can copy it by dragging the stroke with ALT + Left mouse button and dropping just below it.
Change the created stroke thicknesses to 30, 50 and 70. Choose the colors below in the color guide panel.
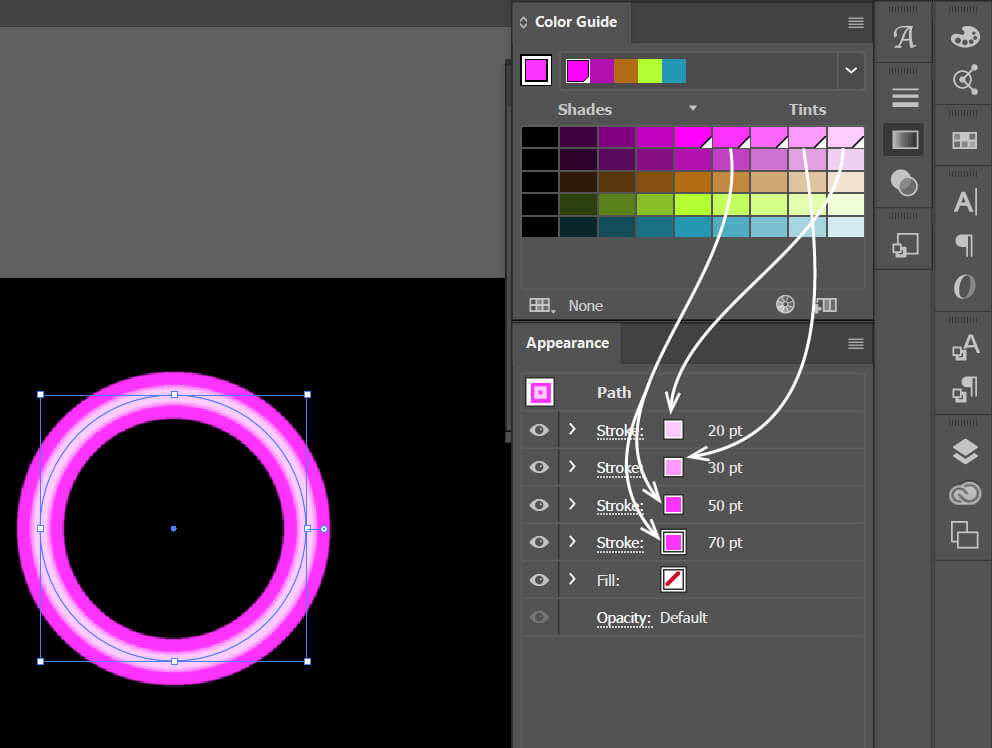
- Finally change the “Gaussian blur” effect values for each stroke.
> Gaussian blur value for Stroke 20: 1
> Gaussian blur value for Stroke 30 Value: 5
> Gaussian blur value for Stroke 50: 15
> Gaussian blur value for Stroke 70: 85
You should have a drawing like the one below.
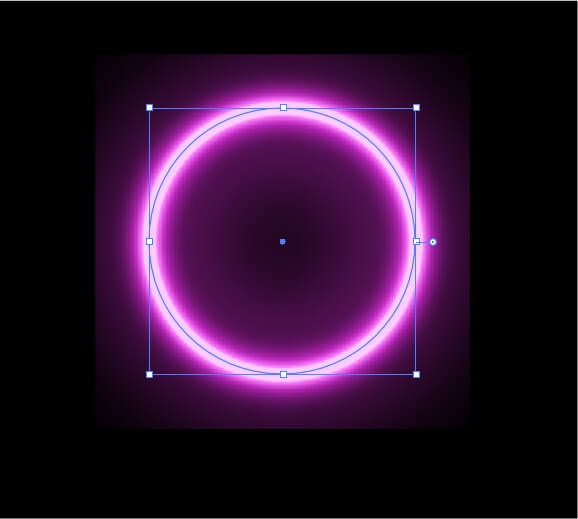
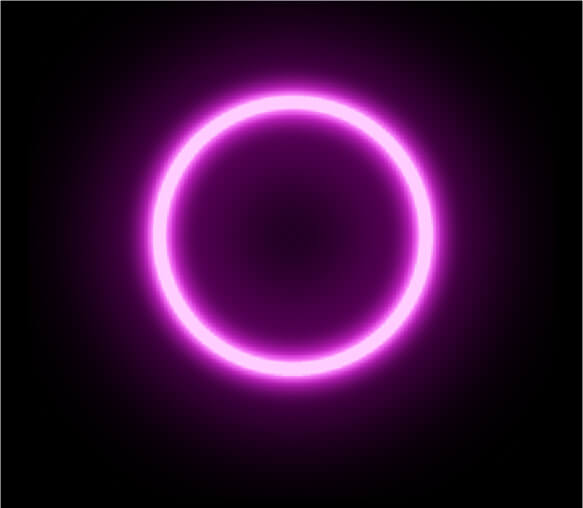
As you can see, the resulting brightness effect is terminated in a square shape. This view is due to the border that the illustrator software applies around objects while creating a raster effect. To increase the limit, open the dialog box with effect> raster effect settings . Increase the pixel value in the window. I changed it to 160.
The result is:
You can apply the neon effect to text in the same way,
Don’t forget to comment and share. Have a good time.
Prof. Dr. Akif Kutlu

")
