* if you are only interested in “how to use expand appearance command in illustrator” jump here.
This document describes how to make a real-time reflection effect using adobe illustrator CC. Live mirror drawing is definitely fun if you know how to set up your Illustrator document.
“Live mirror drawing” means creating a symmetrical object by drawing only half of it. While you draw something on the artboard, the complementary piece is created automatically on the fly across the x-axis or y-axis.
The document also gives you information about how to expand mirrored objects in illustrator in order to copy and paste it into another file. If you are familiar with live mirrored drawing, you might have already noticed that sometimes it is impossible to select and copy the entire drawing. You think that expand appearance command should work for copying. What? Does it not work? because of the expand appearance greyed out in illustrator?
Learning the difference between “expand” and “expand appearance” command will help you to understand why you can not copy whole drawings and what to do. So, to copy your mirrored object you need to know how to expand your final symmetrical drawing.
Are you ready? Let’s get started.
Implementing the real-time reflection effect step by step.
Step 1. Create a Document
- Create a new document (File > New). Define the artboard size you desire.
- Open your layers panel (Window>Layers). Initially, you have only one layer.
- Select the target icon next to the layer name. If selected small circle will appear around the target icon as shown below.
Step 2. Apply an effect
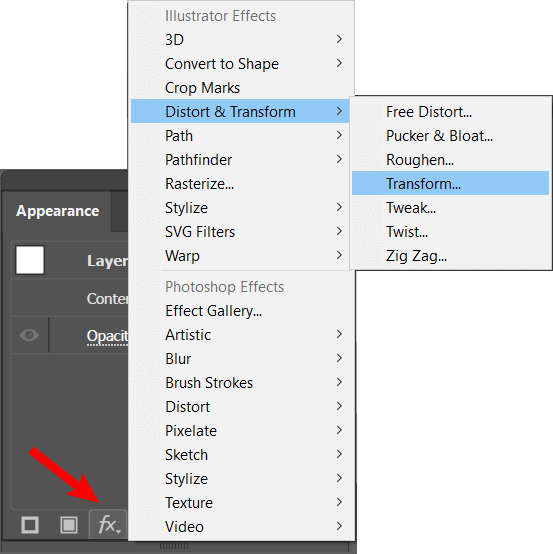
- Go to appearance pannel (Window>Appearance). and click the Fx icon bottom of the panel.
- From the list of the commands, select Distort&Transform then transform.
Transform effect dialog window will appear
- In the dialog box click the required checkbox for the X-axis. Type the number of copies as 1.
- Hit Ok.
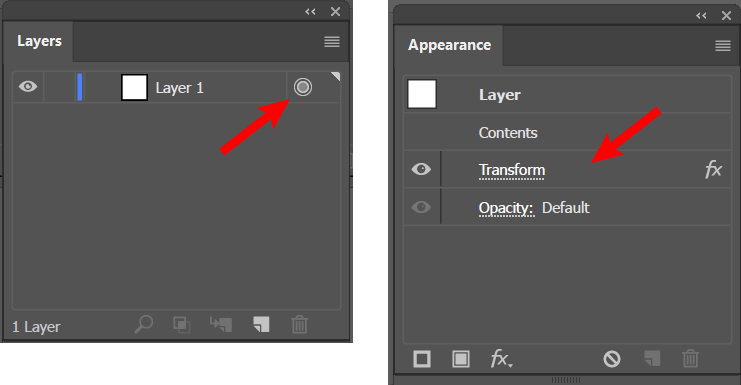
As you may have noticed, the target icon next to the layer name in the layers panel is filled in gray. This means that the layer has an effect applied to it. if the target icon is clicked, the applied effect will be shown in the appearance panel. you may deselect the target icon by holding down CTRL/CMD key and left mouse click.
Step 3. Draw a fake guide for reflection, real guides for an easy draw
Since we applied an effect to the layer, anything you draw in this layer will be reflected either on the x-axis or y-axis depending on your setup.
In this method, the reflection is applied to whole objects based on the geometrical midpoint of the objects in the artboard. The geometrical midpoint changes whenever a new object is drawn. The trick is that if you draw a particular object which covers all the drawings, you keep the midpoint intact.
Therefore, you need to draw a big circle, a rectangle or even a line that covers the entire drawing. This shape will be your fake guide and provides a constant midpoint.
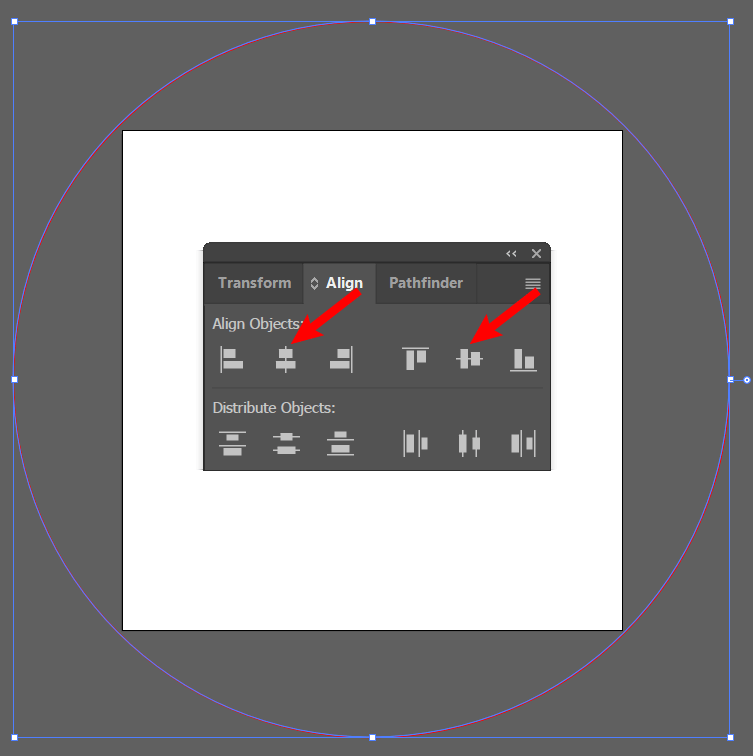
- Draw a big circle using the ellipse tool. Hold down the shift key while drawing to make a perfect circle.
- Make alignment to the artboard. horizontally and vertically centered.
Since this circle will limit the boundaries of the drawings, it does not need to be visible.
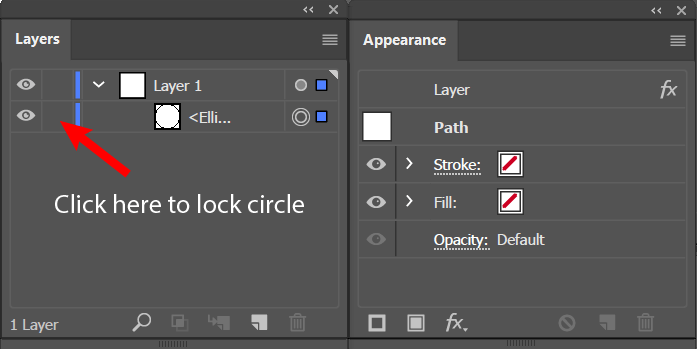
- Remove ve fill color and stroke color of the circle.
- lock this circle using the Layers panel as shown below
Now, the artboard is ready for mirror drawing but to make it more clear where the axis is, we need one more step to make.
- Create another layer and name it “Guides”
- Switch to this layer clicking on the layers panel
- Press CTLR/CMD + R keys to show rulers if not visible
- Drag a guide from the left ruler and drop it to the artboard.
- make alignment horizontally centered.
- You can lock this layer if you like
- Switch back to the previous layer which we are going to draw objects
Step 4. Begin drawing
- Make stroke color black and 3 pt weight.
- If not, turn on “Snap to point” under the View menu and turn off other snaps. this will help you to make a lot more accurate drawing.
- Go to the pen tool. Begin drawing something similar to the below figure. The below figure contains only two smooth anchor points
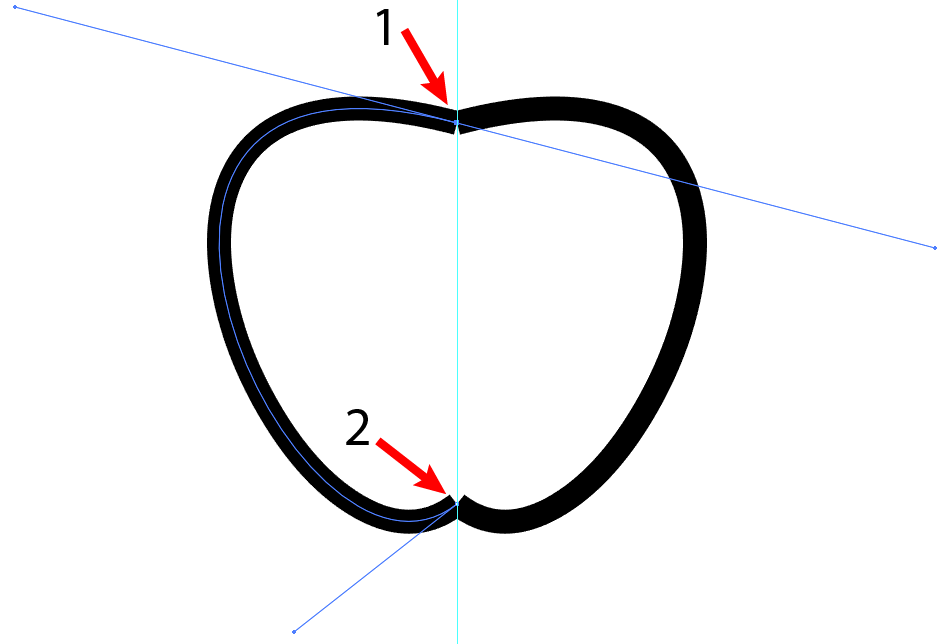
The actual path is on the left-hand side. The right object is only an automatically reflected effect of the left one. Therefore you can not select both objects at the same time.
Step 5. Expand appearance to be able to copy whole objects
Sometimes having the mirrored drawing is not enough for the designers. They want to join the anchor points on both sides. This might be done if the mirrored effect is converted into the real path.
The solution is obvious: using Expand appearance command under the object menu.
Please note that expand and expand appearance command works for different purposes. expand appearance is active only if any effect applied on a path. Regular stroke and colors are not counted as an effect. Therefore the command is grayed out if there is no effect on a path. The same rule is applied for regular shapes and lines. Even the objects created using the shape builder tool and blend tool is not counted as an effect.
in our case, we have a path with 3 pt black stroke and no fill. therefore expand appearance command doesn’t work for us. But we can manipulate and make tricks to use expand appearance command.
Method 1: Using the brush tool as a catalyzer
Brushes are the paths that certain effects applied to it. so the expand appearance command can be used for the brushes.
- pick up the brush tool and make a dot on the artboard. The layer will also automatically create a reflected image for this dot.
- select that brush object on the artboard and goto Object>expand appearance
- ungroup the expanded object and remove the catalyzer (dot created using brush tool) and mirrored one. (sometimes ungrouping command needs to be run multiple times)
Now you have individual paths. you can join anchor points if desired.
Method 2: adding a new stroke using appearance pannel
Adding a new fill or stroke on a path is counted as an effect. Therefore the expand appearance will work for it. let’s do it.
- Select the path you draw.
- Go to appearance pannel (Window>Appearance).
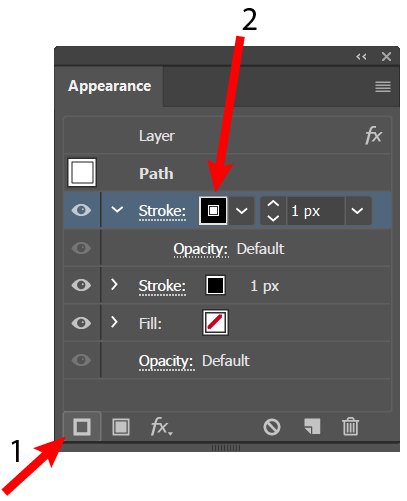
- Click Add new stroke icon (1). a new stroke will be added to the top of the line in the appearance panel.
- Remove the color of the stroke (2) if any.
- keep selecting the path. Goto Object>expand appearance
- ungroup the expanded object
That is it !.
if you have multiple and complex line drawings, adding a new stroke to any one of those lines will be enough for triggering the expand appearance command.
Thanks for reading this article. I hope you found what you were looking for.
Ok. For future work how about adding extra effects? if you completed mirror for the X-axis try adding mirror effect for the Y-axis
Cool isn’t it. let’s take one more step. Try adding multiple copies of the object by giving a rotational angle. This is a mandala.
have fun,
Prof. Dr. Akif Kutlu

