The section between two points on a circle is called an arc. You can create an arc in Adobe Illustrator in several ways. Use the Pen Tool, the Ellipse Tool, or even the Line Segment Tool to draw one. Illustrator also provides a dedicated Arc Tool that lets you draw arcs quickly and precisely.
This article shows you how to use the Arc Tool in Illustrator. It explains two methods for drawing accurate circular arcs, and demonstrates how to draw a full circle using the Arc Tool.
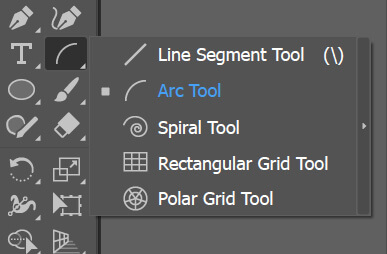
You can find the Arc Tool in the Tools panel. You can use it in two ways. After selecting the tool, click anywhere on the artboard to open the Arc Options dialog box. Or simply click and drag on the artboard to draw an arc freely. The tool draws only one quarter of a circle at a time.
Now, let’s look at the first method.
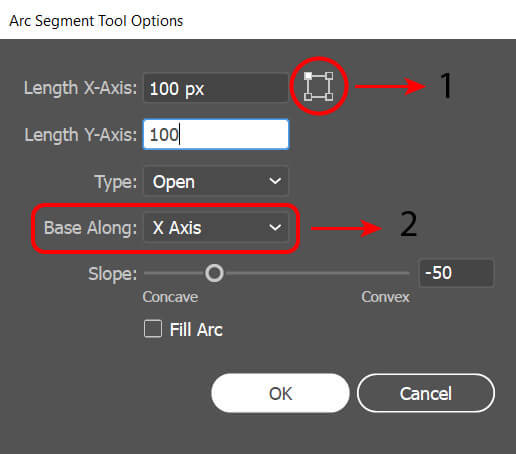
Using the arc segment tool dialog box
The arc options panel consists of several sub-sections. These are: dimensioning, arc starting point (1), whether or not a closed shape, arc direction (2) and slope amount.
All possible arc drawing directions are shown below for 100 by 100 quarter circle. Four colored small squares specify where the arc is starting. For example, if the X-axis direction is selected from the panel as the upper left starting point, The arc is indicated by the black color that is drawn down from the clicked point and to the right on the X-axis.

Now let’s see, for example, what options should be used to draw a complete circle with arcs.
- The top-right starting point and Y-axis for direction
- The top-left starting point and X-axis for direction
- The bottom-left starting point and Y-axis for direction
- The bottom-right starting point and X-axis for direction
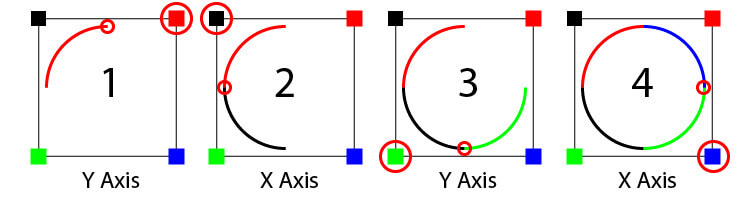
If all quarters are selected and CTL + J is hit, the open arc ends are joined together. Now it is time to see the second method 🙂
Drawing arc on the fly
After selecting the Arc Tool from the Tools panel, you can draw directly without opening the Arc Options dialog box. Just click and hold the left mouse button to start drawing. While drawing, you can use keyboard shortcuts to control the same options that appear in the panel.
For example, press the F key after you start drawing to flip the arc’s direction along the X or Y axis. Press F again to switch it back.
Hold down the Shift key while drawing to create a perfect quarter circle — meaning both endpoints of the arc are equally distant from the center. Use the Up and Down Arrow keys to adjust the curvature of the arc and change this balance.
The following animation illustrates how to draw a circle with arcs using on the fly drawing technique.

Smart Guides would help to align your drawing. If not open hit CTRL + U
I hope it has been helpful. Do not forget to share it if you like.


