The mandala design template is the key to this article. This tutorial focuses on drawing a mandala art using Adobe Illustrator. The main goal of this article is to show how to prepare a Mandala Template for adobe illustrator. Once you set up your document, it will act like a Mandala Plugin.
Create Layers
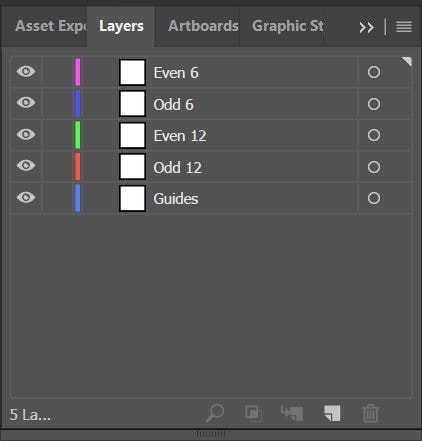
The bottom layer will be your guide layer. Therefore named it as “Guides”. The other layer names refer to how many copies of the object created. “odd 12” means to make 11 copies of the object. “Even 12” means to reflect the object and make 11 copies of them. At this time these are just names. After applying effects to layers, objects created in the corresponding layer will be either circularly copied or reflected and copied.
Create a Guide
To create guides, you need to show up your ruler first. Hit CTRL/CMD + R on the keyboard. And then, Left Mouse in the ruler area. Drag the guide and drop it to the artboard.
Copy Guides
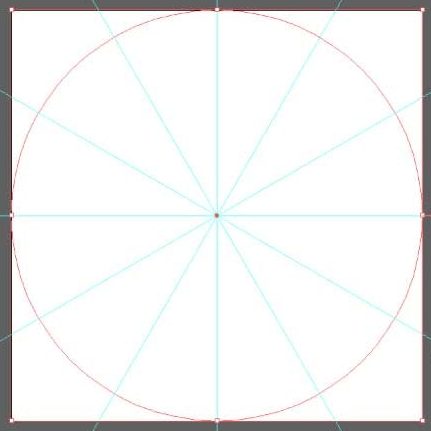
Select the guide you create, Right-click and choose Transform > Rotate. Type 30 degrees (360 degree / 12 section). Hit Copy.

Prepare Odd 12 layer for mandala art
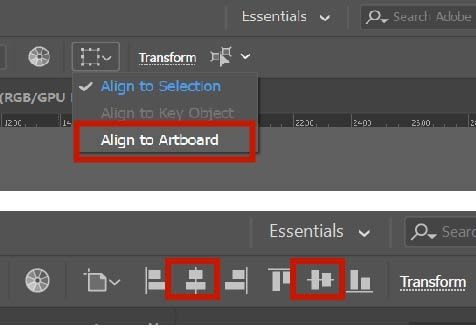
Switch to Odd 12 layer from the layers panel. Go to the Ellipse (L) tool Draw a perfect circle using the left mouse click and ALT/OPTION + SHIFT key. Make it as bigger as your artboard. Apply no fill and no stroke to this circle. Align it vertically and horizontally centered.
Add effect to a layer
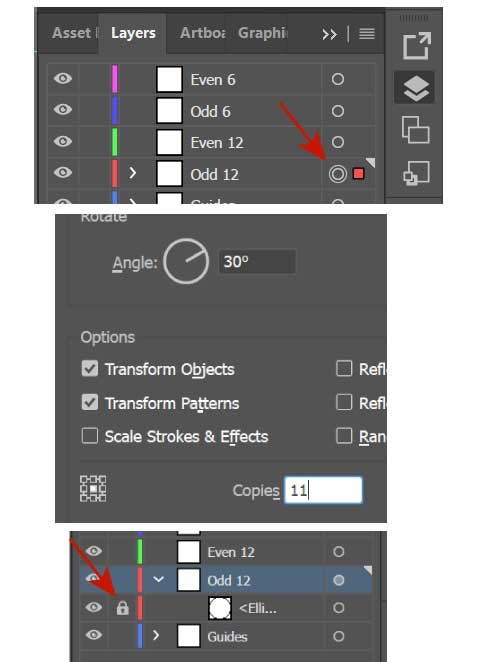
Click Target Icon (small circle) next to the layer name as shown in the figure below. Select Menu item Effect > Distort & Transform > Transform. Make 11 copies and rotate 30 degrees. Hit ok. Don’t forget to lock the circle guide before you create an object as shown in the figure below. Make sure Guides Layer also locked. this will make easier to select objects only.
Create your first object
The layer is now ready for drawing. Draw any simple shape you wish in the Odd 12 layer. This will automatically make 11 copies of the object whatever you draw it in this layer
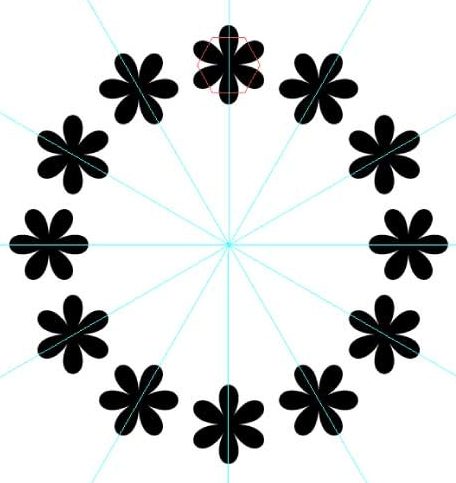
Congratulations. great job. Now let’s copy this layer’s effect to other layers.
To copy the effect from “odd 12” layer to “even 12” layer
- click Odd 12 Layer, unlock the circle guide
- Left-click target icon of Odd 12 with ALT/OPTION key on the keyboard.
- Hold down the ALT/OPTION key and move the effect to another layer
- You also need to copy the circle guide to another layer.
- Click the circle guide on the layers panel
- hold down ALT/OPTION key with the left mouse click, copy to the destination
- Once you copy the effect and circle, switch to another layer ( even 12) by clicking on the layer name
- Open appearance panel
- you should see the copied effect in the Appearance panel
- Now you can modify the effect or add a new effect
To add a new effect
- Click Target Icon (small circle) again next to the layer name.
- Go to Effect > Distort & Transform > Transform.
- make 1 copy and click reflect x checkbox
When you finish modification, don’t forget to lock the circle guide before drawing. Now you should see two effects in the Appearance panel for the “even 12” layer. The first effect will create a reflected copy of the object. and the second one will create 11 copies.
As a result, when all layers are set up and if you draw something into any selected layer, Layers’ effects will automatically be applied to your objects.
If you think the steps are confusing, you can watch the video to see how the process is done. The original language of YouTube Video is English. Turkish Subtitles are available. Enjoy!.

